
Written by Alya Liu — pearl farmer & jeweler.
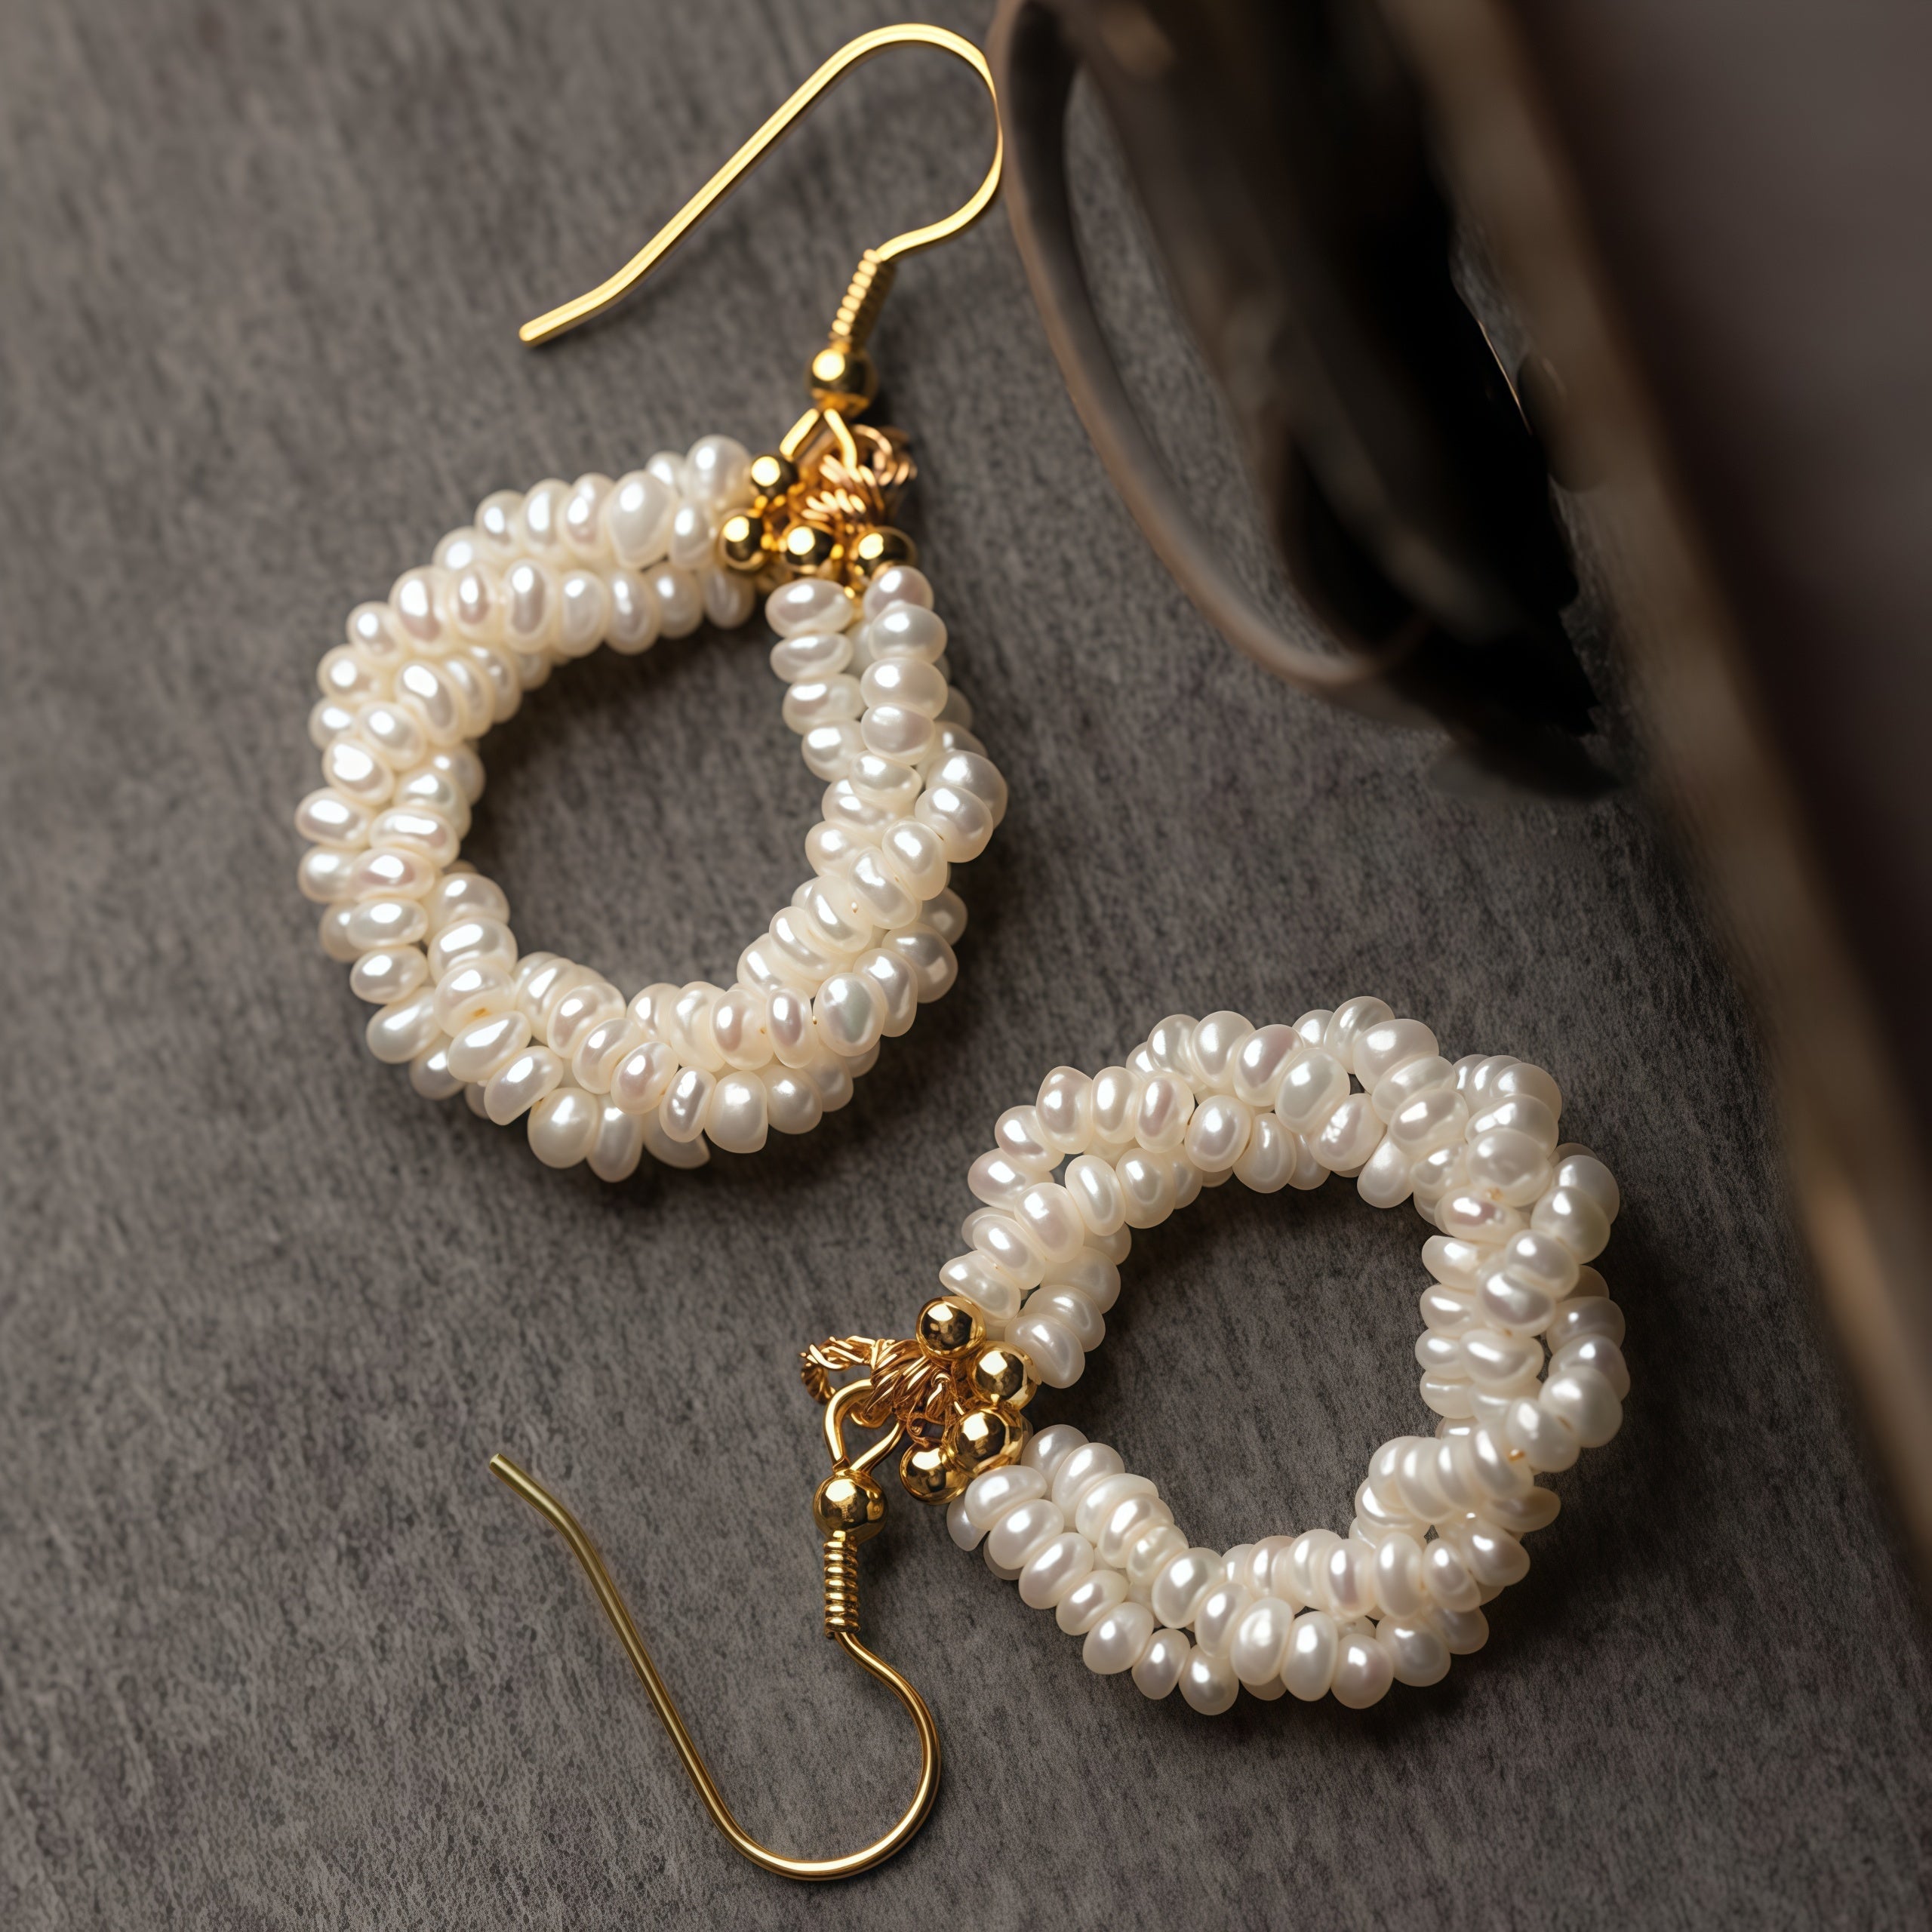
If you have been looking for a pearl earring project that feels elegant but still beginner-friendly, this twisted design is one of my favorites. Today I want to show you how to make pearl hoop earrings using small freshwater pearls, gold-tone wire, and a simple twisted structure that gives the finished earrings a fuller, softer look.
This project uses quite a few pearls, but the method itself is not complicated. In fact, once you understand the logic of the beginning loop, the ending loop, and the twisting step, the rest becomes very manageable. The finished style sits somewhere between classic pearl hoop earrings and pearl drop hoop earrings, so it works beautifully for everyday wear or as a handmade gift.

Prefer a finished piece? We also offer ready-made three-layer spiral pearl hoop earrings for those who love this look but would rather skip the DIY process. Click here to shop.
Materials You Need for DIY Pearl Hoop Earrings
Based on the tutorial images, here is the full materials list for one pair:
| Material | Quantity | Notes |
|---|---|---|
| Drilled 3 mm freshwater pearls | 72 pieces | 36 pearls per earring, 18 on each side |
| 3 mm gold beads | 4 pieces | Two for each earring |
| 4 mm jump rings | 2 pieces | Used to connect the hoop to the earring hook |
| Earring hooks | 1 pair | Gold-tone hooks shown in the tutorial |
| 0.3 mm gold-tone craft wire | 4 strands | Two strands per earring |
| Needle-nose pliers | 1 | For holding and tightening |
| Round-nose pliers | 1 | Helpful for shaping loops |
| Wire cutters | 1 | For trimming the excess wire |
| Ring or round object | 1 | Optional, for helping shape the curve |

How to Make Pearl Hoop Earrings: Step-by-Step
Step 1: Make the starting loop
Take two strands of wire and hold them together. Using your pliers, create a small loop at one end and wrap the wire around itself twice to secure it. This first loop is important because it sets up the whole earring structure.
One of my biggest recommendations here is to keep the beginning loop neat and compact. Later, the gold bead will slide into place and should visually cover the wrapped section, so do not make the wrapped neck too bulky.

Step 2: Add the gold bead and prepare both wires
Trim the excess wire with cutters, then use needle-nose pliers to pinch the joint closed. Once the loop is secure, thread one gold bead onto both wires. The bead should sit right over the wrapped section and hide it as much as possible.
This is one of those small finishing details that makes a handmade piece look more polished. If the wrap is too long, the gold bead will not cover it well. If it is too short, the loop may not feel secure. Aim for a balanced, proportional finish.

Step 3: Thread 18 pearls onto each wire
Now separate the two wire ends and thread 18 pearls onto each wire. Each earring uses 36 pearls total, split into two matching pearl strands. Try to keep the count even so the finished hoop will stay balanced.
At this stage, gently slide the pearls downward so they sit close together, but do not force them too tightly yet. You will fine-tune the tension before closing the end.

Step 4: Bring both wires together and finish the end
Pass both wires together through the second gold bead. Before you make the closing loop, push all the pearls downward so the strand sits snugly. Then make the end loop the same way you made the beginning loop.
This step is where many beginners either leave too much extra space or make the strand too tight. My usual advice is to leave just enough room for the strand to bend and twist naturally. After you close the end, slide the gold bead into position so it covers the wrapped section. If the strand ends up slightly longer than expected, that is usually fine—the pearls will compress a little during the twisting step.
Step 5: Twist the pearl strand tightly
Now comes the signature move. Twist the strand like a rope: one side up and the other side down. Keep twisting until the structure feels firm and will not twist much more.
Try to twist it tightly. This is what gives the earring its fuller texture. If you notice a few pearls bunching inward, use your fingers to nudge them slightly outward so the line of the hoop looks cleaner.

Step 6: Shape the hoop and attach the earring hook
Once the strand is twisted, bend it into a curved hoop or teardrop shape. Then use a jump ring to connect the pearl hoop to the earring hook. Repeat the same method for the second earring.
This is the moment when the piece really comes together. What started as simple wire and small pearls now reads as a pair of graceful gold pearl hoop earrings.

Alya’s Tips for Better Gold Pearl Hoop Earrings
- Keep the beginning and ending loops close in size. This helps both sides of the finished earring feel balanced.
- Let the gold bead cover the wrapped section. It creates a cleaner and more refined jewelry finish.
- Push the pearls downward before closing the end. This helps you judge the correct finished length more accurately.
- Do not leave the wrap too long or too short. Too long looks messy; too short can make the loop feel unstable.
- Twist firmly. A loose twist will not give you the same dimensional look that makes these hoop pearl earrings stand out.
- Adjust the pearls after twisting. If needed, gently move the outer pearls so the shape looks smooth and even.
Common Mistakes to Avoid
The most common issue I see is uneven tension. If one side is looser than the other, the hoop will not sit evenly. Another common problem is a loop that is too large at one end and too small at the other. Small details like that matter a lot in earring making, especially with delicate pearl designs.
I also recommend using real drilled freshwater pearls whenever possible. They have more warmth and depth than imitation pearls, and even a simple DIY project looks better when the luster is natural. If you are new to pearl basics, GIA has a helpful overview here: Pearl Gemstone Guide by GIA.
Why These Pearl Hoop Earrings Are Worth Making
As someone who works with pearls every day, I like this design because it turns very simple materials into something that looks much more refined than the actual construction. Small 3 mm pearls can sometimes look too plain on their own, but when you twist two pearl strands together, the surface becomes more dimensional and the earrings instantly feel more finished.
This is also a great project if you love gold and pearl hoop earrings but want a lighter, more handmade version. The shape is slightly teardrop-like rather than perfectly round, which gives the earrings a softer silhouette and a more delicate American-style jewelry look.
Watch a Pearl Hoop Earrings Video Tutorial
If you like seeing the construction in motion, here is a related YouTube tutorial that complements this project well:
Final Thoughts
If you have been wondering how to make pearl hoop earrings at home, this is a lovely design to start with. It is elegant, practical, and easy to personalize. You can keep the look minimal with white freshwater pearls and gold findings, or experiment later with different pearl sizes, metal tones, or a slightly longer drop shape.
Personally, I love this design because it combines the softness of pearls with the structure of wirework. It looks sweet and polished without being too formal. And once you make one pair successfully, it is very easy to adapt the same method into other DIY pearl hoop earrings styles.


Leave a comment
This site is protected by hCaptcha and the hCaptcha Privacy Policy and Terms of Service apply.